Sidebar
Wizard Installation Instructions
These are the installation instructions for those that wish to install the software using the wizard.
We recommend using this installation method over the alternate Zip package installation.
This method uses an executable wizard that you run from your home computer. Note that the wizard executable package (which will end in .exe) is meant to be executed "locally", you do not upload the entire file to your site.
Using the wizard package to install the software is more simple and easy compared to the Zip package, as using the wizard combines steps 3-5.
- Create new MySQL database on your server. <
- Download the fresh install wizard package from the Client area. The file should end in .exe, and the download will be labeled something similar to:
Geodesic_CA_ent_full_install_wizard_v###.exe <
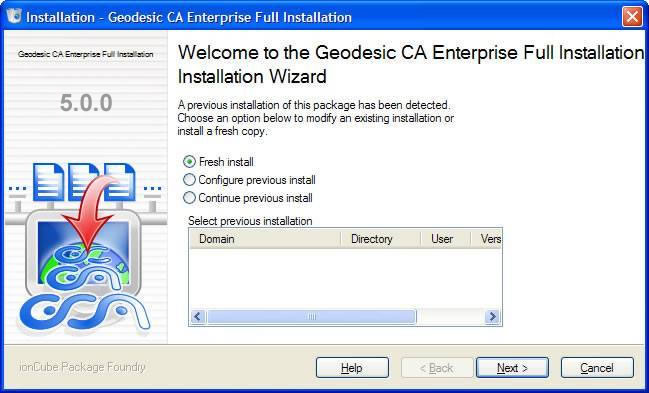
- "Double-click" on the executable file that you have downloaded to your PC. You will see a box similar to the image below. Click "Next" to begin the installation process.
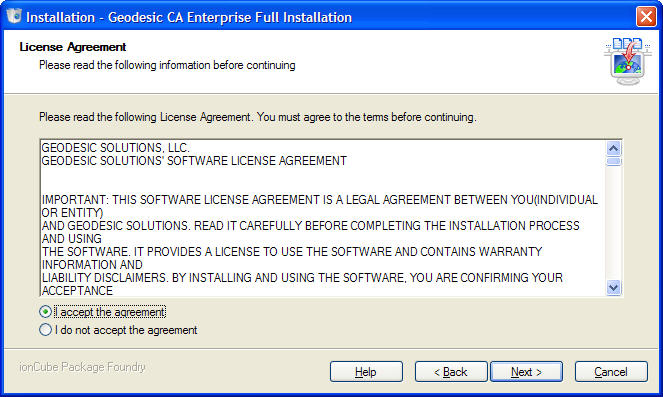
- In the next window, you will need to accept the License Agreement in order to continue with the installation. Select "I accept the agreement" and then click "Next".
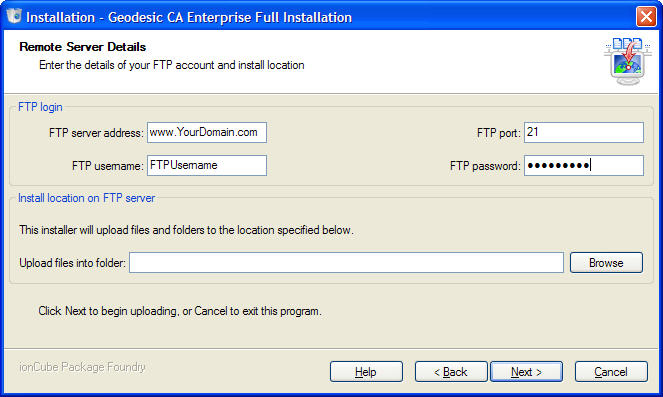
- In the next step, the Wizard will perform the file transfer (FTP) process to your domain for you. Enter your FTP information into the fields and click the "Browse" button. Your host should provide you with the information necessary to FTP into the server.
After clicking the "Browse" button, the Wizard will attempt to connect to your domain. Once connected, a new popup window will display and you will select the location that you want the software installed. If you want the software to show up as the front page of your domain, you will need to select the root folder (sometimes 'www', or 'htdocs', or 'httpd', etc.). Or, you can create a directory, such as 'listings' by selecting the "Make New Folder" button and install the software in that directory if you like. Make your selection and the click the "OK" button. If you are not certain as to which folder is the "root" directory on your domain, please contact your host. <
- Now you should see the previous window (above) and in most cases the "Upload files into folder" field will now be filled in with a server path to the folder you have just selected. Click "Next". <
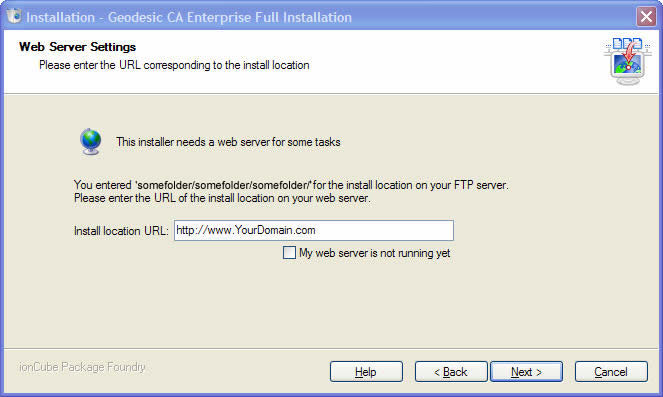
- The next window will display a URL path to the folder you have selected and should look similar to the image below. If everything looks correct, click the "Next" button.
- The Wizard will then run a series of server tests and provide a report for you to review. This report is for informational purposes only. Select the "Install" button to continue with the installation. <
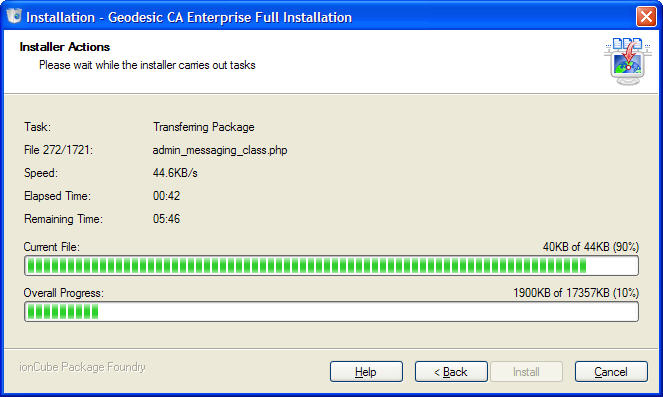
- The Wizard will then begin the FTP process of the software's files to your domain. A window similar to the one below will display the progress of the installation. The length of time to complete this process depends upon your Internet Connection speed. The uploading should be complete within 20 minutes at Broadband speed.
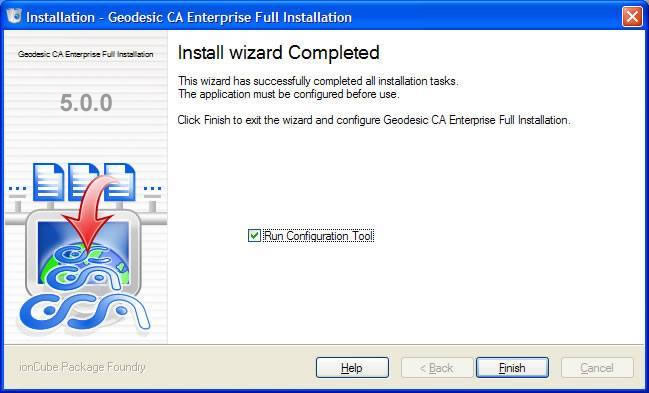
- After all of the files have been successfully transferred to your domain, the Wizard will display a window similar to the one shown below. Check the 'Run Configuration Tool' box if it is not already and select the "Finish" button. If you see a window that does not look similar to the window below, see Wizard Troubleshooting.
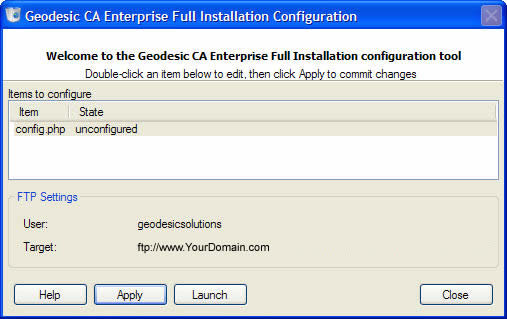
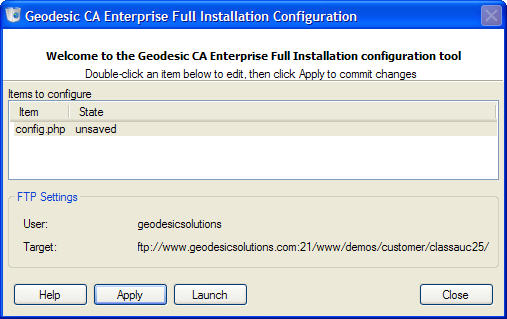
- Now you should see a window similar to the one below. It is now time to edit the software's config.php file with the MySQL database information obtained through the database utility on your host (domain's) control panel. "Double-click" the "config.php" text in the window to open the file for editing.
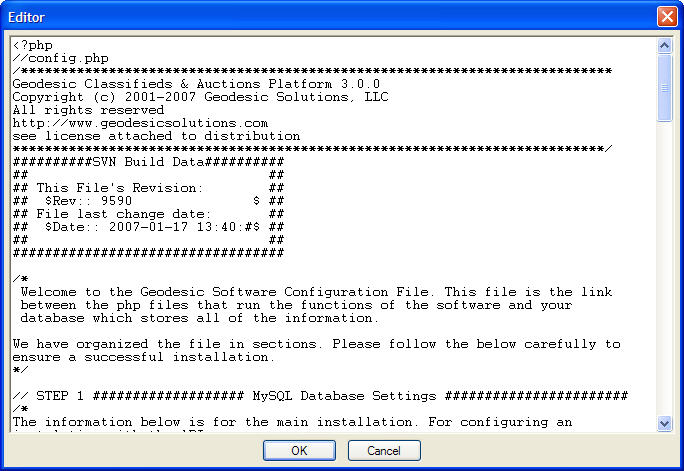
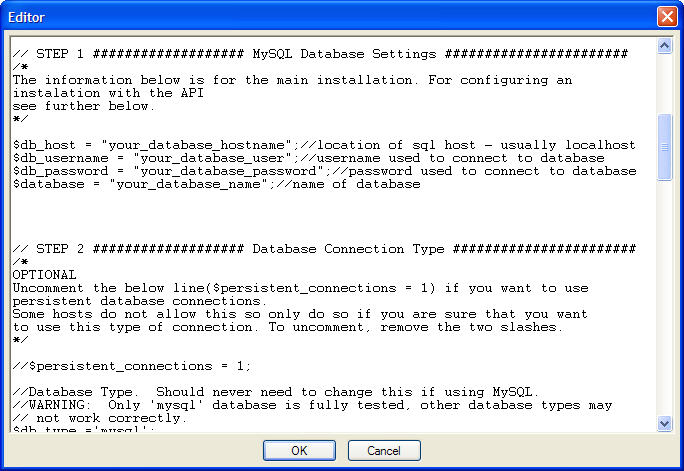
- The file you have just opened should look similar to the one below. The main purpose of the config.php file is to provide the connection information between the software you are installing and the database you have set up on your server. Therefore, the data you enter must be absolutely correct. Any wrong entry or even an extra space entered into the config.php file and the software will not connect to the database.
- Scroll down until you see STEP 1 as shown below. There are four entries that you need to make under STEP 1. You will replace the text that we have pre-populated and surrounded by quotes. Leaving the quotes in place and without adding any spaces, enter the database information you obtained from your hosting account when setting up the database.
<tip w c>IMPORTANT: The db_host field is NOT the name of your hosting provider. The db_host field is the name of the server that your database is located on. This is almost always "localhost", but it can also sometimes be an "ip address" or some other name similar to "sql.secureserver.net". If you are unsure, you need to contact your host. They are the only ones that can answer this for you.</tip>
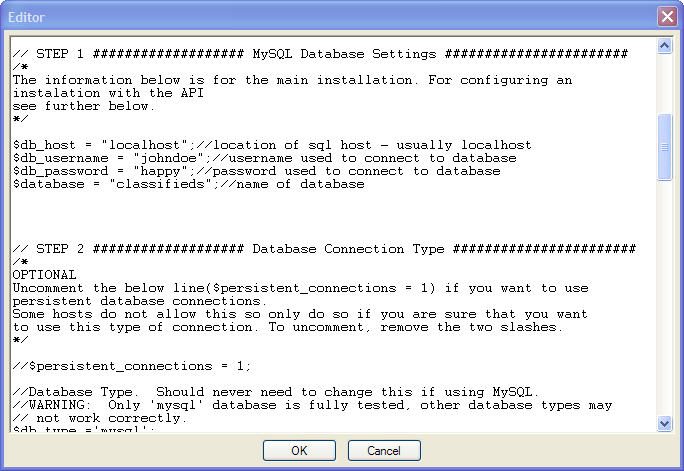
- Your config.php file should now look similar to our example file below, except of course, with your database information. When you are satisfied with your entries, click the "OK" button and the window will close.
- You will now, once again see the same window as before, except that the "State" of the config.php file will be "unsaved" instead of "unconfigured". See image below.
- Click the "Apply" button and the config.php file will be saved. Also, a new popup window will open which takes you into the software's Browser Based Installation Wizard. If this popup is not automatically started for you, you will need to run the web-based installation script manually by visiting setup/index.php using your favorite Internet browser. For example, if your site was example.com, you would run example.com/setup/index.php in your browser. It will guide you through all the steps. <
- Once you have completed the setup script, follow the link on the last page to the admin panel and log into the admin for the first time. The admin user/pass will be set to the default of "admin", and "geodesic", respectfully. <
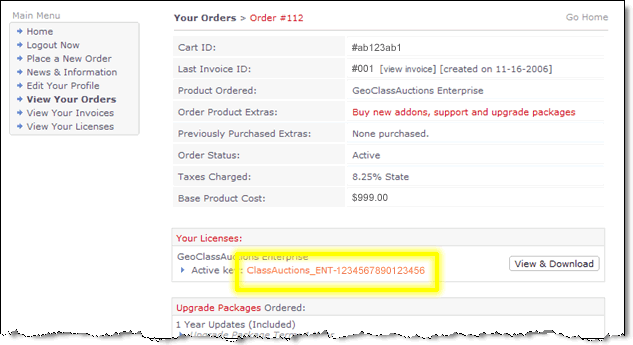
- When you log in for the first time, you will need to enter your license key. You can find the license key displayed in our client area on the order page, as illustrated in the image below.
- When the installation process is complete, delete the directories listed below and all the contents of each from your site. You can do so through your hosting control panel's "file manager" if there is one, or by using FTP.
- pre_setup/ <
- setup/ <
- sql/ <
- upgrade/ <
<
- The software should now be installed. Enjoy! <

