User Tools
Sidebar
tutorials:server:installation_with_trial_backup
This is an old revision of the document!
First Things First
First, thank you so much for your purchase of our software. Some clients wish to keep the changes they have already applied to their software trial on our servers. This will allow them to basically "start where they left off" in the trial. Please be sure to contact any of our sales staff to obtain a backup of your trial installation. The trials will be live for a period of two weeks. We will have access to the database for that trial for another two weeks after the trial expiration date. If we do not obtain the backup prior to this date
<tip c h>The page layout and required steps may vary slightly depending upon the version of phpMyAdmin that is installed on your site.</tip>
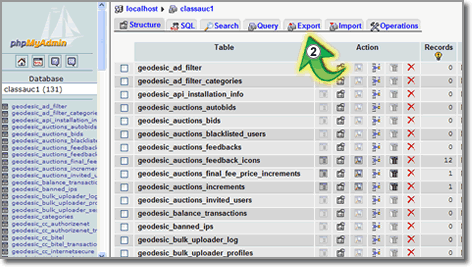
- Select the database name you want to backup from the dropdown list in the left side of your screen.

- When the screen refreshes you will see a list of tables that are currently present within the database you just selected. The same set of table names will display on both sides of the screen. You will also see several tabs at the top of the screen. Click on the "Export" tab.
- When the screen refreshes (see image below for reference) click on the "Select All" link. All of the tables in the Export box will then be highlighted in blue.
- Next, make sure that the "SQL" radio button is selected.
- Some versions of phpMyAdmin will allow you to choose SQL export compatibility. If yours does, choose MYSQL323 from the dropdown. Otherwise, skip this step.
- Next, check the "Add DROP TABLE" box so that your exported tables will contain drop tables (This is extremely important step).
- Check the "Save as file" box. This will allow you to save the file to a location on your pc, rather than simply displaying the export on your screen.
- Finally3), click the "Go" button.
- You will then see a popup box asking you what to do with the data you are wanting to save. Select "Save to Disk" and then "OK" 4) Now choose the location on your PC that you want to save the file to.


When the process has finished, you will have a complete backup file of your database's tables in an SQL format. Essentially, what you have created is a "snapshot" of your database at that given time to be rerun at a later time if needed. That's all there is to it. Congratulations…you have just backed up your database.

1)
hold down CTRL and left click to de-select
2)
Since this table is so huge and the data itself never changes, you do not need to back up this table. If you ever need that table restored, just re-install the ZipSearch Addon.
3)
Well, almost finally
4)
These exact terms may vary depending upon the browser you are working with.
tutorials/server/installation_with_trial_backup.1278090009.txt.gz · Last modified: 2014/09/25 16:55 (external edit)
Except where otherwise noted, content on this wiki is licensed under the following license: CC Attribution-Noncommercial-Share Alike 4.0 International
