User Tools
Sidebar
Table of Contents
Listing Details Page
Page Specifics
The Listing Display page is one of those special pages we mentioned earlier. It not only uses the basic_page.tpl template (and the basic page's subtemplates), but also its own "details" template depending upon whether or not you are working with a "classifieds details" page or "auction details" page. Therefore, we have broken things down piece by piece for you in the following sections.
Description: This is the Listing Details Page of your site. The information (data) that you see is being displayed due to one or more of the following three reasons:
- Template - The template (also called a .tpl and marked with a green page icon) currently assigned to this page is displaying the images or text through its HTML.
- CSS file (COLORS/STYLES) - There is a theme_styles.css file located in the "external_files" folder or you "my_templates" folder, which controls many of the colors and fonts on the page.
<tip c n>IMPORTANT: The key to editing anything on "any" page is to figure out what is making it display in the first place. And the only way for you to determine this is to open the TEMPLATE (.tpl) assigned to the page you want to edit. Since the Listing Display Page has the basic_page.tpl you will need to first familiarize yourself with the Basic Page Layout.</tip>
How it works... Templates
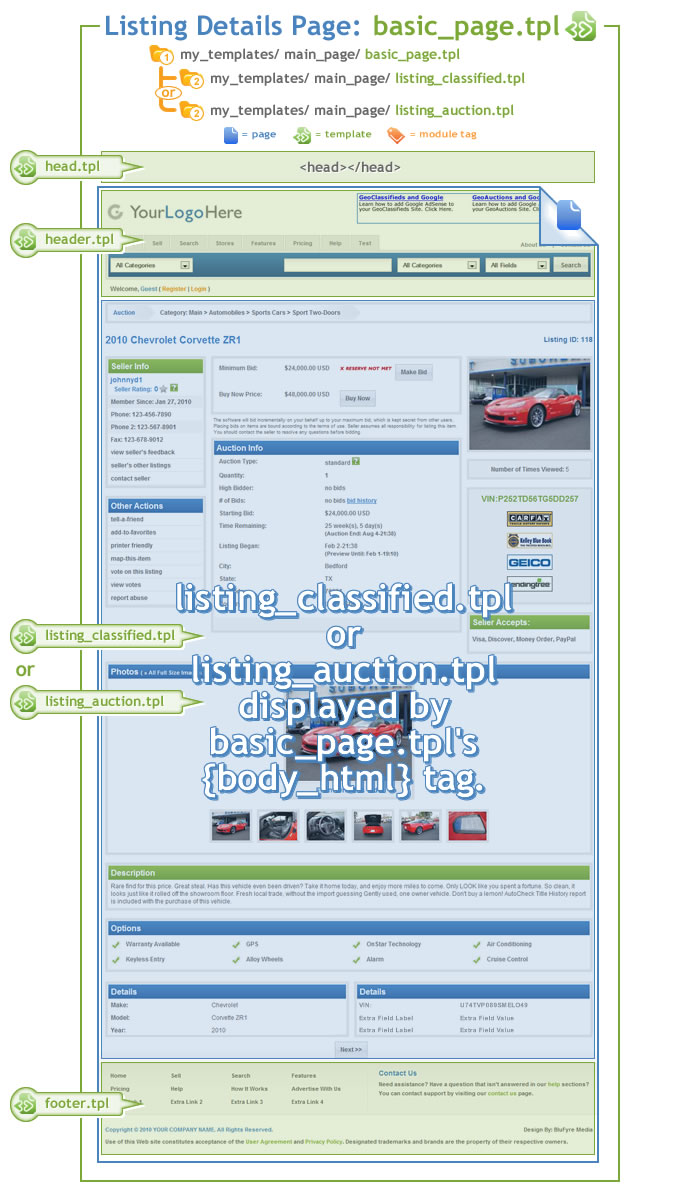
The basic_page.tpl is the overall template that is used to contain the information displayed on the Listing Details Page. Below is a snapshot of the template which shows all of the sub-templates we used to display what you are seeing.
Body HTML
You may remember from the Basic Page Layout Tutorial, that the Basic Page Template is made up of several sub-templates (head.tpl, header.tpl, and footer.tpl) which are also shown above. The Basic Page Template also contains a {body_html} tag, which is used by the software to display the specific content for the page that is currently being viewed. The body HTML for the Listing Details Page will be discussed in the next section.
When the basic_page.tpl is used for the Listing Details Page, the software uses the location of its {body_html} tag to display the appropriate Listing Details Template for the page (either listing_classfied.tpl or listing_auction.tpl). The actual Listing Details Template that is applied depends upon the edition of software you are using and whether or not the visitor is viewing a classified ad or auction. Regardless, both templates are very similar. They just have different 'auction' or 'classified' specific fields within them.
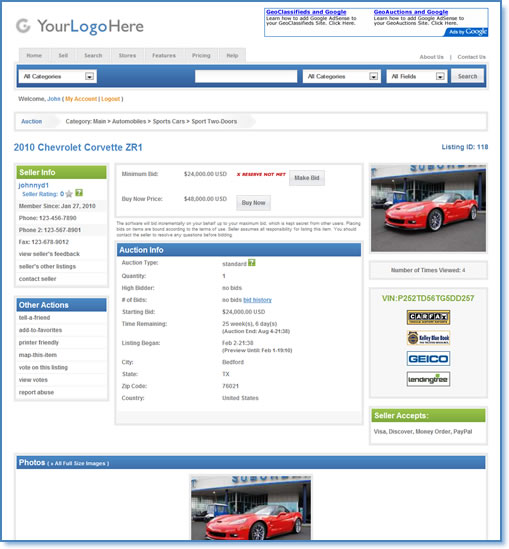
In this section we will use an auction detail page snapshot (below). But the premise of this discussion applies to both the classifieds details page and auction details page.
We will not cover every single detail of this page, because viewing the template itself within the DESIGN > MANAGER menu shows you which tags are used to display specific fields. We will, however, cover the more commonly requested areas of the template in an attempt to provide a little more detail for you. Each tag represents two things…
- Location - In other words, wherever the tag is located in the template is where its associated text will be displayed.
- Text - The actual text that gets displayed. All text on the Listing Details Page is located in the following menu:
PAGES MANAGEMENT > BROWSING LISTINGS > LISTING DISPLAY PAGE > [EDIT TEXT]
The tags below are numbered based upon their references within the image above:
(1) - Seller Rating Tag {$seller_rating} - This is an Auction Only feature. Seller rating stars can be edited within the following menu:
FEEDBACK > FEEDBACK MANAGEMENT
(2) - Gadgets Tag - This section of HTML is displayed by use of Smarty Include tags1), and on a category by category basis. For instance, by default, we have set up specific HTML to be displayed within the Automobiles category listings and Real Estate category listings. Essentially, all we are doing is including certain bits of HTML to get displayed, but only if the current listing is in Automobiles or Real Estate. That "referenced" HTML is simply being stored in its own files and within a folder we've named gadgets. The gadgets folder is located in your software's admin panel here:
DESIGN > MANAGER > main_page TEMPLATES > GADGETS
(3) - Report Abuse Link - The Listing Details Page offers several "additional text" fields to use within the template. To display the Report Abuse Link, as well as, the contents for the email subject and message we have used the following tags: {$additional_text_8}, {$additional_text_9}, and {$additional_text_10}. The [email protected] email address is located directly within the listing_auction.tpl and listing_classified.tpl templates.
(4) - Payment Options Tag {$payment_options} - You can set up any number of payment options for your sellers to choose from here:
LISTING SETUP > PAYMENT TYPES
Additionally, you can allow the Seller to complete the sale of an auction item with the buyer using PayPal by enabling it in the following admin menu:
PAYMENTS > SELLER TO BUYER GATEWAYS
(5) - Image Block Tag {$image_block} - The software gives you the ability to change the way in which your photos are displayed. You can find settings for this section in your admin panel here:
LISTING SETUP > FILE UPLOAD & DISPLAY SETTINGS
(6) - Description Tag {$description} - This tag displays the seller's description of the listing. You can manage the description length on the following admin page:
LISTING SETUP > FIELDS TO USE
(7) - Extra Question Tags {$extra_question_XX, etc.} - This section is where your "category specific questions" are displayed. You can add an unlimited number of category questions per category here:
CATEGORIES > CATEGORY SETUP > [EDIT QUESTIONS] for your category
(8) - Extra Checkbox Tag {$extra_checkbox_name} - Similar to Extra Question Tags above, checkboxes are displayed by accessing the following admin menu and by designating that the 'extra question' be a 'checkbox':
CATEGORIES > CATEGORY SETUP > [EDIT QUESTIONS] for your category
If you want to change the default 'check' image, you can do this by replacing (overwriting) the following image:
IMAGES > BACKGROUNDS > bullet_list_checkmark.gif
Or, you can change the reference to that image by editing it within the css file in the following admin menu:
DESIGN > MANAGER: external/ css/ theme_styles.css
(9) - Optional Field Tags {$optional_field_XX, etc.} - The software has up to 20 Optional Fields, managed through the following menu:
LISTING SETUP > FIELDS TO USE > OPTIONAL FIELDS


