User Tools
Sidebar
Table of Contents
Footer Layout
The footer of the page is entirely contained in the footer.tpl template file. In this page of the wiki we will go over the layout, and help with how to make changes, add/remove links, and things like that.
Overall Layout & Breakpoints
The entire footer is contained in the sub-template footer.tpl. It uses HTML5 tag <footer> surrounding the main contents of the footer like so:
<footer class="page">
...
</footer>
Note that just like with the <header> tag, the page can actually contain more than one <footer> tag. For this reason, the footer has the CSS class page so that it can be styled independently of any additional <footer> sections you may wish to add to your own custom design in addition to the main one.
The Footer is broken up into 4 main parts, the footer links, the "contact us" area, the copyright / user agreement text, and the area to put your custom JS used on every page. We'll go over each part of the footer in a dedicated section for each one on this page (further down).
The footer actually has 2 breakpoints, for a total of 3 different modes that you can see in the screenshots below.
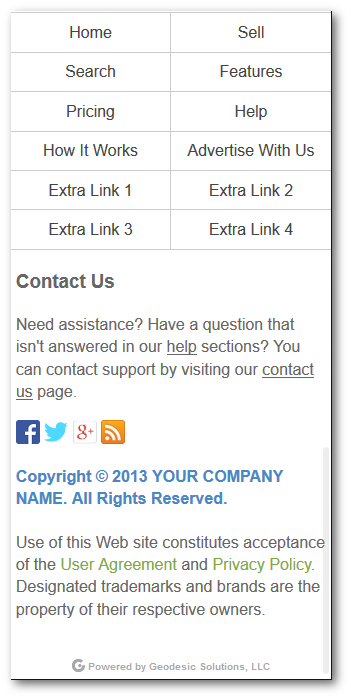
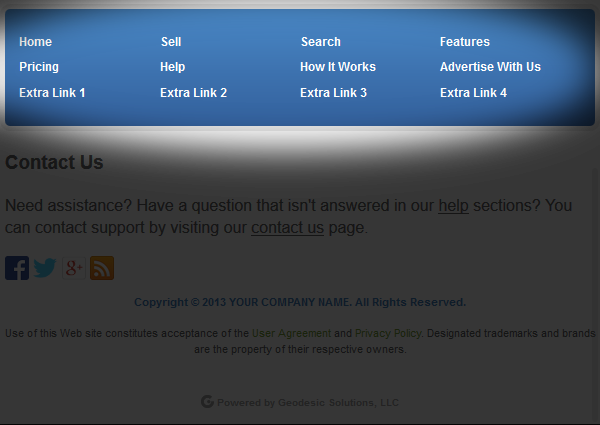
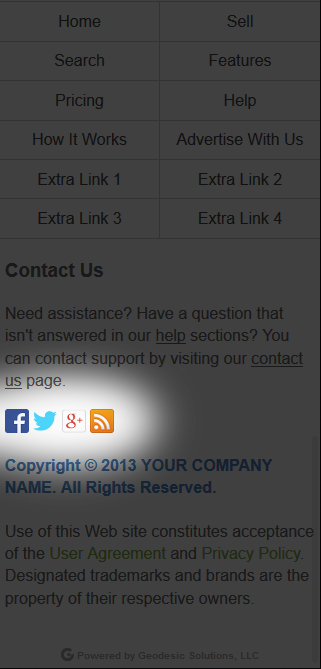
Small View:
As you can see in the screenshot above, the footer links are displayed in a 2 column grid, and the other information is displayed in normal paragraph style.
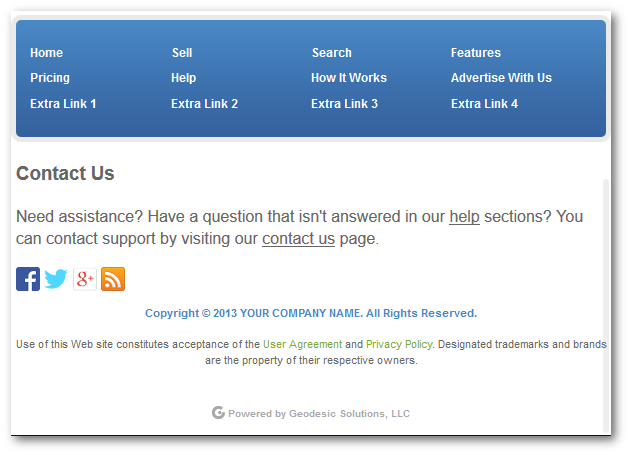
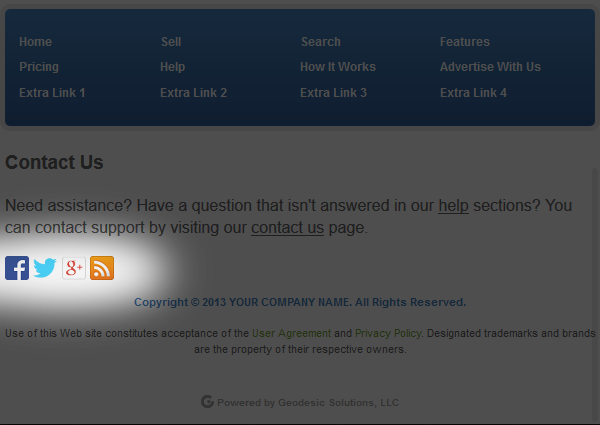
First Breakpoint: 37.5em (600px)
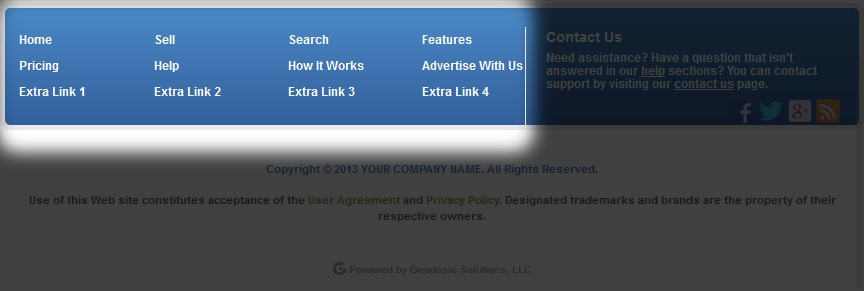
In the first breakpoint, the main change is that the links switch to be inside the box with blue background, similar to how they look in the largest breakpoint but without the "about us" information on the right hand side. That's because there basically isn't enough room "yet" to show those links and the about info, so that happens at a secondary breakpoint:
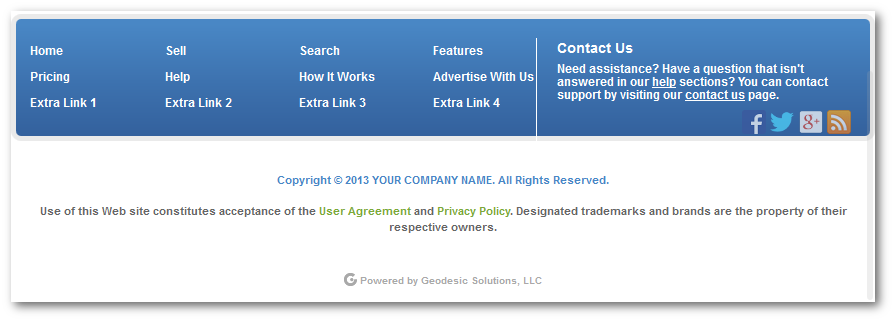
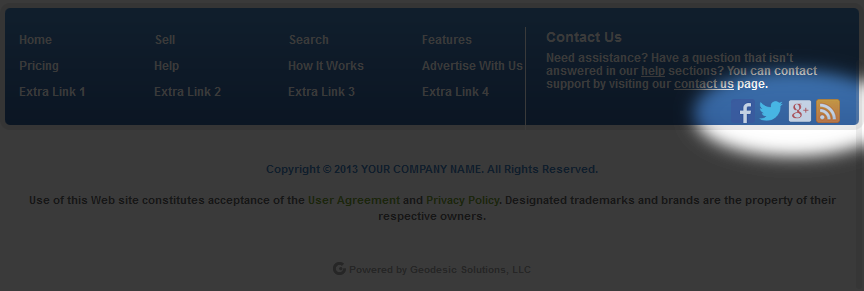
Second Breakpoint: 54em (864px)
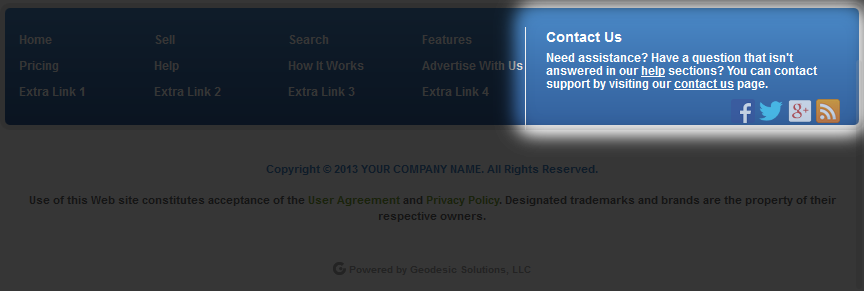
In this larger breakpoint, there is now room to fit the "about us" blurb on the right, along with the social links grouped as part of the "contact" info. You will notice that every part of the footer displayed no matter what size screen you are using, but the layout changes to respond to the screen size. This behavior lies at the heart of what RWD is all about, using the same content that has a layout that responds to the device's size and capabilities.
Adding / Removing Footer Links
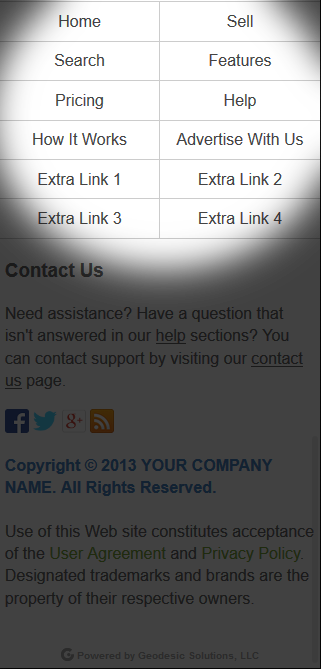
The first part of the footer is the navigation links, highlighted in the screenshots below.
Small View:
As you can see in the screenshot above, the footer links are displayed in a 2 column grid, and the other information is displayed in normal paragraph style.
First Breakpoint: 37.5em (600px)
In the first breakpoint, the main change is that the links switch to be inside the box with blue background, similar to how they look in the largest breakpoint but without the "about us" information on the right hand side. That's because there basically isn't enough room "yet" to show those links and the about info, so that happens at a secondary breakpoint:
Second Breakpoint: 54em (864px)
The HTML markup is exactly the same for all 3 layouts, like so:
<nav class="footer clearfix"> <a href="index.php">Home</a> <a href="index.php?a=1">Sell</a> <a href="index.php?a=19">Search</a> <a href="index.php?a=28&b=135">Features</a> <a href="index.php?a=28&b=143">Pricing</a> <a href="index.php?a=28&b=141">Help</a> <a href="index.php?a=28&b=137">How It Works</a> <a href="index.php?a=28&b=144">Advertise With Us</a> <a href="">Extra Link 1</a> <a href="">Extra Link 2</a> <a href="">Extra Link 3</a> <a href="">Extra Link 4</a> </nav>
If the HTML looks relatively simple, then we did our job here! Throughout the design, navigation links use a very simple markup, just an HTML5 tag <nav> with the <a> links inside it.
First, to remove the unused extra links: Remove the 4 lines, including the starting <a> tag and ending </a> tag. Specifically, remove these 4 lines, virtually every site will want to do this:
		<a href="">Extra Link 1</a>

		<a href="">Extra Link 2</a>
		<a href="">Extra Link 3</a>
		<a href="">Extra Link 4</a>
Those "extra links" are there just to illustrate that additional links can easily be added to your footer.
To add your own link, you would add a link similar to this:
<a href="LINK_URL">Link Name</a>
Add that on it's own line in the order you would like it to appear in. You would change LINK_URL to the link address you wish to link to, and change Link Name to the text to use for the link. Be sure to add that before the ending </nav> tag which signifies the end of the footer links.
Editing Pages linked to by the above links
Those links go to extra pages in the software. Each of those pages uses a specific extra page body template to display the content of those pages. To edit either of the templates below you would open your template set in the DESIGN > MANAGER admin tool. Then to edit the contents of the "features" page look to make changes in the following template:
/main_page/extra_pages/seller_buyer_features.tpl
To edit the contents of the "features" page look to make changes in the following template:
/main_page/extra_pages/pricing.tpl
And no the above page is NOT dynamically generated. The variety of ways that pricing can be setup within the software and the amount of time it would take to make the above page dynamic is prohibitive and most likely not the way you would want it to display. So we leave this one for you to edit.
To edit the contents of the "help" page look to make changes in the following template:
/main_page/extra_pages/help.tpl
To edit the contents of the "Advertise With Us" page look to make changes in the following template:
/main_page/extra_pages/advertise_with_us.tpl
Contact Us Section
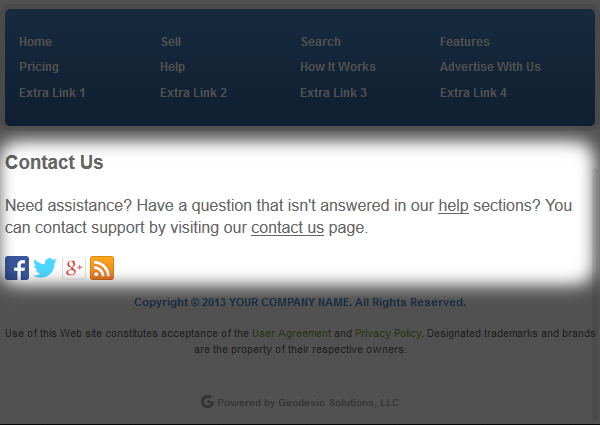
Small View:
First Breakpoint: 37.5em (600px)
Second Breakpoint: 54em (864px)
The HTML markup is exactly the same for all 3 layouts, like so:
<div class="blurb"> <h3>Contact Us</h3> <p>Need assistance? Have a question that isn't answered in our <a href="index.php?a=28&b=141">help</a> sections? You can contact support by visiting our <a href="index.php?a=28&b=136">contact us</a> page.</p> <nav class="social-contacts"> <a href="#" title="Facebook"><img src="{external file='images/icons/social/facebook.png'}" alt="Facebook" /></a> <a href="#" title="Twitter"><img src="{external file='images/icons/social/twitter.png'}" alt="Twitter" /></a> <a href="#" title="Google+"><img src="{external file='images/icons/social/google+.png'}" alt="Google+" /></a> <a href="rss_listings.php" title="RSS Feed"><img src="{external file='images/icons/social/rss.png'}" alt="RSS Feed" /></a> </nav> </div>
The <h3> and <p> tags are specially styled when inside the footer section, as illustrated in the screenshots further up.
Social Links
We actually consider the social links as a sub-section of the Contact Us Section.
Small View:
First Breakpoint: 37.5em (600px)
Second Breakpoint: 54em (864px)
The HTML markup is exactly the same for all 3 layouts, like so:
		<nav class="social-contacts">
			<a href="#" title="Facebook"><img src="{external file='images/icons/social/facebook.png'}" alt="Facebook" /></a>
			<a href="#" title="Twitter"><img src="{external file='images/icons/social/twitter.png'}" alt="Twitter" /></a>
			<a href="#" title="Google+"><img src="{external file='images/icons/social/google+.png'}" alt="Google+" /></a>
			<a href="rss_listings.php" title="RSS Feed"><img src="{external file='images/icons/social/rss.png'}" alt="RSS Feed" /></a>
		</nav>
You can add your own links if you wish. You can even copy or move the social links to the header if you want the social icons to show at the top of each page. For each social site that you use, change the # to the link for your own account on that site. For instance:
Facebook:
Sample URL: http://www.facebook.com/GeodesicSolutions
Sample HTML Snippet1):
<a href="http://www.facebook.com/GeodesicSolutions" title="Facebook"><img src="{external file='images/icons/social/facebook.png'}" alt="Facebook" /></a>
Twitter:
Sample URL: https://twitter.com/GeodesicSol/
Sample HTML Snippet2):
<a href="https://twitter.com/GeodesicSol/" title="Twitter"><img src="{external file='images/icons/social/twitter.png'}" alt="Twitter" /></a>
Google+
Sample URL: https://plus.google.com/+GeodesicSolutions
Sample HTML Snippet3):
<a href="https://plus.google.com/+GeodesicSolutions" title="Google+"><img src="{external file='images/icons/social/google+.png'}" alt="Google+" /></a>
We recognize that there are many social sites out there, and in the past the default design shipped with about 7 or 8 different icons showing in the header. In the new design (starting with 7.3), we made a decision to limit the number to just 4 social icons. If you are active across more social sites, you can easily add more icons for whatever social sites you use. At the same time, if you are not currently active on any of the default social sites, and don't want to start, just remove the line from the template! It's that easy.
Using +1 / Like / Share Snippets Provided by Social Sites
The default design links to the different social sites, and that's all, it does not use the snippets generated by each respective social website for a very good reason: Those load things from 3rd party sites, for instance the "like" button will load how many likes the page already has, and the image will be loaded from Facebook's own servers. This can greatly slow the page down, especially during peek times, your own website may become very slow and un-responsive if any of the social sites are currently loading slowly.
For those reasons, it is actually a very common practice to merely link to social sites without using the fancier HTML snippets that allow users to "like" your site or "share" your site. The exception to this in the software, is when using the sharing addon, it will use the social website based "sharing" tools. Even though it does slow down the page load, we feel that adding the ability to share a specific listing warrants the extra load time as it adds a very useful service. However we do not use this on "every page" of the website, since such tools would rarely be of use other than for a specific listing.
That said, you can add a social badge to the footer if you wish, just make sure you realize that this can slow down every page on your site, especially for mobile devices. You would copy/paste the applicable "badge HTML snippet" into your template where you would like the badge to appear.
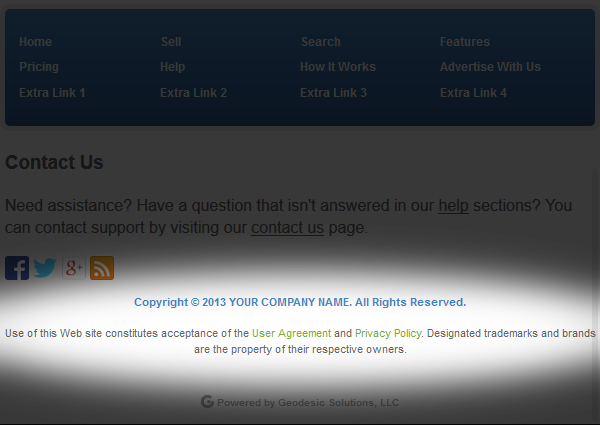
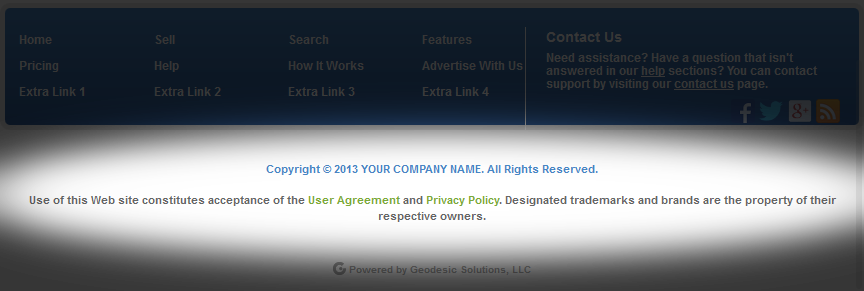
Copyright / User Agreement
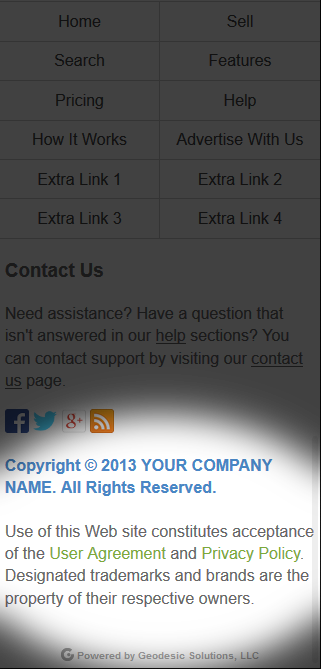
Small View:
First Breakpoint: 37.5em (600px)
Second Breakpoint: 54em (864px)
The HTML markup is exactly the same for all 3 layouts, like so:
<div class="disclaimer"> <h4>Copyright © {$smarty.now|date_format:"%Y"} YOUR COMPANY NAME. All Rights Reserved.</h4> <p>Use of this Web site constitutes acceptance of the <a href="index.php?a=28&b=140">User Agreement</a> and <a href="index.php?a=28&b=145">Privacy Policy</a>. Designated trademarks and brands are the property of their respective owners.</p> </div>
Be sure to change YOUR COMPANY NAME in the template to your own company or website name. You can also adjust the text as needed, or even remove the entire section if you feel it is not needed on your site.
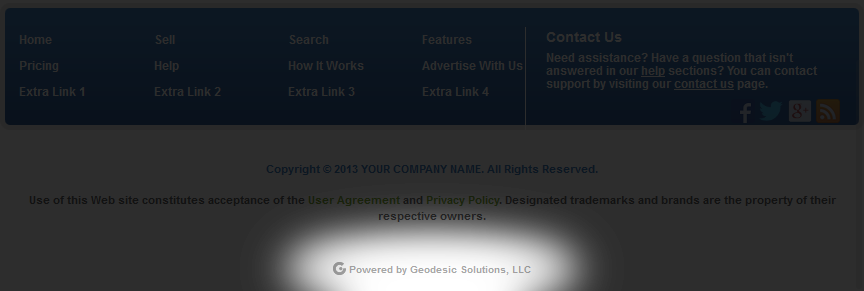
Remove Powered By Geodesic
The Powered By section is actually not part of the footer. This is generated by the software itself. You can remove it (or turn it on if it was previously turned off) in the admin at:
Site Setup > General Settings > Show "Powered By"
To turn it off, set the setting to Remove Branding.

