User Tools
Sidebar
This is an old revision of the document!
Table of Contents
Settings
This page holds the main settings for the Geographic Navigation Addon.
<tip c w>Note: Countries and State/Provinces are part of the main software, and are used by payment gateways to process payments, and are also used to calculate taxes. The unlimited levels of regions and sub-regions added by this addon, however, are not restricted by having to conform to country or state/province level.</tip>
In order to use the Geographic Navigation Addon, you must insert the addon tag into your template where you want the filter selection to be displayed.
Display Settings
These settings change how the geographic navigation will be displayed.
Number of Columns
This is the number of columns that will be used when displaying all the region or sub region choices. The default value is 1 column.
Display full tree
This affects how the current region or sub region that is selected is displayed.
Display full tree: Checked
This is the default setting. Displays similar to "Category Tree" if category tree view is turned on when browsing categories.
No regions or sub regions selected:
Region (United States) selected:
Sub-Region (California) selected:
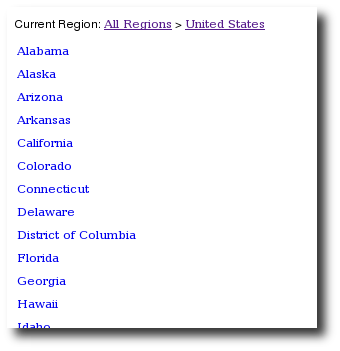
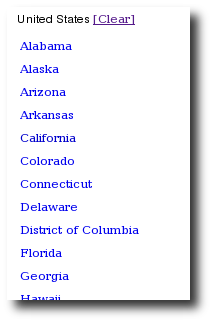
Display full tree: Un-Checked
With the setting un-checked, the first line only shows the current region or sub-region. This is ideal if you need a more "compact" look to match your design needs.
No regions or sub regions selected:
Region (United States) selected:
Sub-Region (California) selected:
Location in Registration Data
These settings are synonymous with the main Fields to Use settings, as it pertains to information collected during user registration.
Use
If this is checked, during user registration or when displaying/editing user details, it will use Geographic Navigation tied to the user. If used, and the user selects the region they are in, when that user places a listing the Geographic Navigation drop-downs will be pre-populated, and will be able to change on a per listing basis to be different than info tied to User info.
Require
If Use is un-checked, this setting does not apply. If checked, when the user registers or edits user data, they are required to select at least the top level region.
Require Full Location Depth
If Use is un-checked, this setting does not apply. If checked, the user can't stop on a region if that region has any sub-regions under it. They must keep selecting sub-region levels until they get to a region that has no sub-regions attached to it. Note that if Require is un-checked, and this setting is checked, the user would be allowed to not select any location at all, but if they did select a location the above mentioned restrictions would be in effect.
Location in Listing Fields to Use
This is the equivalent of the Listing Setup > Fields to Use for the Geographic Navigation addon, in order to allow more control these settings are Plan Item Based meaning they are set on a per price plan basis, in the Plan Item section.
Because of how Plan Item Settings work, within fee-based price plans you have the ability to set category based pricing, and thus, are able to set the settings noted below on a per category basis within fee-based price plans.
<tip c n>Note: If a Location is not set for a listing, either because the user did not fill it out, or the "use" setting is not checked in the settings described below: when a user has selected a geographic location in the geographic navigation, any listings with no location data will automatically be filtered out. There is not currently a way to make a particular listing display no matter what geographic location is selected.</tip>
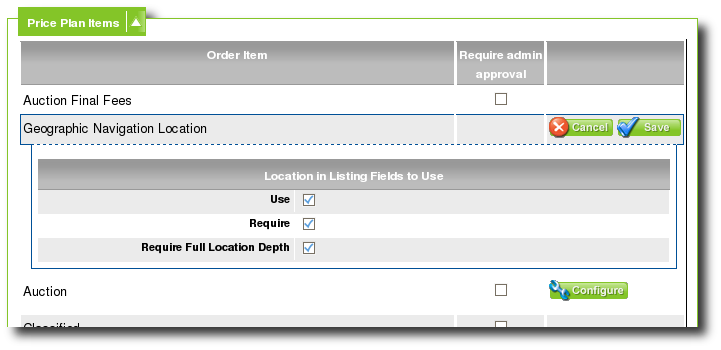
The settings specific to listing detail collection are set per price plan, and per category1) if you elect to use category specific cost for a particular price plan. In this section will be "shortcut" links to go directly to the configuration settings for each price plan that is configured in the system, one link for each price plan. Each "shortcut link" takes you to Pricing > Price Plans Home > Edit > Cost Specifics/Category Specific Costs > Configure for Geographic Navigation Location, as illustrated in the screen shot below.
Geographic Navigation Location - Plan Item Settings
When you click on one of the shortcut links in the Location in Listing Fields to Use section, it will take you to a page with something similar to the screen shot above.
Use
If this is checked, during listing placement or listing edit, it will display drop downs for the user to select the geographic location, using regions from the Geographic Navigation Addon. It can also display geographic location information on the listing details page, if the correct tag is added to the listing details template(s). By default, upon installation "use" is checked for all price plans.
Require
If Use is un-checked, this setting does not apply. If checked, when placing or editing a listing, the user is required to select at least the top level region.
Require Full Location Depth
If Use is un-checked, this setting does not apply. If checked, the user can't stop on a region if that region has any sub-regions under it. They must keep selecting sub-region levels until they get to a region that has no sub-regions attached to it.
Template Tags
This section lists the different template tags that must be placed in certain templates, in order to display certain things pertaining to the Geographic Navigation addon.
It will list 2 different tags within your Geographic Navigation addon admin tool. These two tags are used within your design to place that specific functionality at that spot in the design. You can use the "insert tag" feature of the source code editor within the Design > Manager admin tool to place the proper tag where you have selected within the source code editor.
Geographic Navigation Tag
This tag displays the geographic navigation that the user would use to narrow the listings displayed by a particular region. We recommend placing this tag on the front page template, and any basic page templates which you want to display the geographic navigation on. One possible spot is right under the main category navigation module tag, you might just find everywhere that module tag is used in the templates, and place this one right below it in every template.
Listing's Geographic Location Tag
This tag displays the geographic location specific to a listing. It should be placed in the listing details template(s) if you wish to display that info to the user. A good spot might be right below where the listing title is displayed.
<tip c n>Note: You can use the insert tag tool to place the proper tag for you within the following admin tool and explained here:
Design > Manager</tip>


