User Tools
Sidebar
tutorials:design_adv:using_language_template_set
This is an old revision of the document!
How to Import Language Template Set
These instructions will walk you through the steps needed to use any of the Language Translations provided in the public downloads on our site.
- Create a new language in the admin panel for the language you will be importing, if you have not already. You can do that in your admin panel on the page Languages > Add New Language, just type in the name of the language and click Save. This may take a while so be patient as it creates all of the text for this new language. <
- Download the language translation template set provided in the public downloads on our site to somewhere on your computer, and keep track of where you downloaded it to. You can find that section here. <
- In your admin panel, go to Design > Template Sets. Near the bottom of the page, click on the button to Upload Template Set. You should see a window similar to the one below:
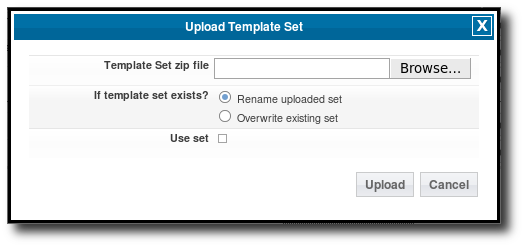 <
< - Click the Browse button and browse to where you downloaded the language template set file to in step 2, and select the language template set file. Use the option to Rename uploaded set so that if you already have another template set with the same name, it will not over-ride that template set. <
- Click the Upload button. <
- When it is done uploading, you should see the new template set listed in the list of template sets. Click on the button Import Text Changes next to the uploaded template set. When you do, you will see a window that looks similar to below:
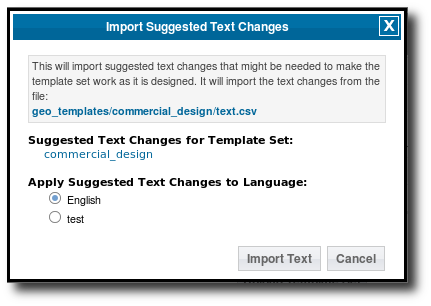 <
< - In the options for what language to import the changes to, select the language that you created back in step 1, then click Import Text. This step may take a while so be patient as it imports all the text for the language. <
- Once the import is complete, make sure the new template set is active by checking the active box next to the template set, if it is not already. <


tutorials/design_adv/using_language_template_set.1284760009.txt.gz · Last modified: 2014/09/25 16:55 (external edit)
Except where otherwise noted, content on this wiki is licensed under the following license: CC Attribution-Noncommercial-Share Alike 4.0 International
